How to Clean Earphones Properly and Safely in 2026?
How to Clean Earphones Properly and Safely in 2026?
Earphones spend more time in contact with the human body than almost any other piece of technology you own. They sit in your ear canals, pressed against your skin for hours, collecting earwax, dead skin cells, sweat, oils, and environmental debris with every single use. Despite this intimate and relentless accumulation of biological material, most people clean their earphones rarely or never — treating them more like furniture than a hygiene-critical personal device. Cleaning earphones properly isn't just about maintaining audio performance; it's about protecting your ear health, extending the life of your equipment, and getting the most from every listening session.
Whether you use in-ear wired earphones, true wireless earbuds, over-ear headphones, or sports-specific designs, the fundamentals of safe earphone maintenance apply across all categories with appropriate variations for each type. This guide covers every aspect of the process — from everyday hygiene routines to deep cleaning sessions for neglected equipment — with specific guidance for different materials, designs, and use cases.
Why Is Cleaning Earphones So Important for Your Health and Sound Quality?
Most users think of cleaning earphones primarily as a way to restore muffled sound. While that's accurate, it's actually a secondary motivation compared to the health implications of wearing uncleaned earphones. The ear canal is a warm, slightly moist environment with limited airflow — conditions that make it uniquely hospitable to microbial growth. When you press earphones against this environment for hours at a time without cleaning them between sessions, you're creating a biological feedback loop that has real consequences for your ears and your health.
Can Dirty Earphones Cause Ear Infections or Health Problems?
Yes — and this isn't a theoretical concern. Multiple clinical and consumer health studies have documented the bacterial loads on regularly used but uncleaned earphones, and the findings are consistently alarming. Earphones transfer bacteria from their surfaces to the ear canal with every insertion, and bacteria that wouldn't cause problems in open air can proliferate in the warm, enclosed environment created when an earphone seals against the ear canal.
The ear canal's natural self-cleaning mechanism (the slow migration of dead skin cells and cerumen outward) can be disrupted by prolonged earphone use, particularly with in-ear designs that create a physical barrier. This disruption, combined with continuous reintroduction of bacteria from uncleaned earphone surfaces, creates conditions for outer ear canal infections (otitis externa), folliculitis, and general irritation. For users who already produce significant earwax, the risk is compounded because earwax-coated surfaces are particularly effective bacterial growth media.
The earbud care tips that matter most for health aren't the elaborate ones — they're the simple, consistent practices of wiping down earphones after each use and performing thorough cleaning weekly.
What Types of Bacteria and Fungi Can Live on Unwashed Earphones?
Research on unwashed earphone surfaces has identified a concerning range of microorganisms. Staphylococcus aureus — including methicillin-resistant strains (MRSA) — has been cultured from shared earphones in multiple studies. Pseudomonas aeruginosa, a common cause of swimmer's ear and outer ear infections, thrives on earphone surfaces exposed to sweat and moisture. Various Streptococcus species, coagulase-negative staphylococci, and gram-negative bacteria have all been found on regularly used earphones that haven't been disinfected.
Fungi are equally relevant. Candida species and Aspergillus can colonize earphone surfaces, particularly foam ear tips that retain moisture effectively. Fungal ear infections (otomycosis) are less common than bacterial ones but more difficult to treat and more likely to recur if the source of reinfection (the uncleaned earphone) isn't addressed. The headphone hygiene principle that surfaces continuously pressed against skin need the same hygiene standards as other skin-contact items applies directly here.
How Often Should You Clean Earphones to Stay Safe?
A practical earphone hygiene routine involves at minimum a light wipe-down after every use — this takes under 30 seconds and removes the fresh surface deposits before they have time to dry, harden, and harbor microbial growth. A more thorough weekly clean addresses the mesh, tips, and housing with appropriate cleaning solutions. A deep clean every month addresses any hardened buildup, charging contacts, and components that don't receive attention in quick cleaning sessions.
For shared earphones — in homes with multiple users, in schools, in offices — the disinfect earphones protocol after every user change is non-negotiable from a health perspective. No amount of "they're clean enough" reasoning outweighs the biological reality of what uncleaned shared earphones represent.
Does Cleaning Earphones Actually Improve Sound Quality?
The relationship between earphone cleanliness and acoustic performance is direct and measurable. Sound travels through the earphone's driver, through the acoustic channel, and through any mesh or grille screens before reaching the ear canal. Any physical obstruction along this pathway absorbs, reflects, or diffracts sound energy — reducing volume, changing frequency response, and creating the muffled quality that users notice first when earphone maintenance has been neglected.
Even a thin film of earwax coating the inside of an ear tip or partially blocking the mesh creates a meaningful impedance to sound transmission. A completely blocked mesh — which can develop over months of use without cleaning — can reduce effective sound level by 50% or more and dramatically alter the frequency balance, typically suppressing high frequencies more than bass. The earphone sound quality fix that results from proper cleaning often surprises users who thought their earphones were worn out when they were simply dirty.
How Does Earwax Buildup Block Sound in Earphones?
Earwax is a wax-lipid compound that liquefies slightly with body heat during use, allowing it to flow into the microscopic openings of earphone mesh screens during insertion and seal them as it cools. This process happens incrementally with every use — each session deposits a small additional layer, and the cumulative effect over weeks and months can seal the mesh almost completely. The mesh openings on in-ear earphones are measured in tens to hundreds of micrometers; even a thin wax film can significantly reduce their effective acoustic aperture.
Beyond the mesh, earwax can flow deeper into the acoustic channel of in-ear earphones during use, accumulating in the sound bore where it acts as a physical barrier between the driver and the ear canal. This is the stage at which sound quality degradation becomes most severe, and it's also the most difficult stage to address with standard cleaning methods because the contamination is inside the earphone housing rather than on the accessible outer surface.
Can Dirt and Debris Permanently Damage Earphone Drivers?
Yes — this is the most serious consequence of sustained earphone neglect. The speaker driver in earphones consists of an extremely thin diaphragm (often thinner than a human hair), a voice coil, and a magnet system. If debris penetrates through the mesh into the driver cavity, it can contact the diaphragm directly. Earwax, which contains dissolved mineral compounds, can corrode the metallic components of the driver assembly over time. Hard debris particles can physically puncture or deform the diaphragm, creating permanent sound distortion.
The remove earwax from earbuds imperative isn't just about mesh maintenance — it's about preventing migration of contaminants into the irreplaceable driver component. Once driver damage from contamination occurs, no amount of cleaning restores the original sound quality. The earphone is structurally compromised in a way that requires driver replacement (expensive or impossible for most consumer earphones) or full device replacement. Regular cleaning prevents this damage pathway from ever developing.
How Does Dirt Affect the Lifespan of Your Earphones?
The lifespan impact of dirt on earphones operates through several parallel mechanisms. Cable degradation from absorbed oils and sweat is one of the most visible — cables that have never been cleaned develop a brittle, degraded outer jacket that cracks and separates, leading to internal wire breaks. The connection between the cable and housing is a particularly vulnerable point where accumulated dirt creates mechanical stress points.
For wireless earphones, the charging contacts are critically vulnerable to contamination. A film of body oils, oxidized sweat residue, or lint on charging pins creates electrical resistance that reduces charging efficiency and, over time, can cause contact corrosion that permanently impairs charging function. The earphone maintenance guide principle of keeping contacts clean is one of the most directly impactful things you can do for wireless earphone longevity.
What Parts of Earphones Get Damaged Fastest from Dirt?
The mesh screen is the first component to show functional degradation from dirt accumulation, as described above. The silicone ear tip attachment ring — where the tip seals against the earphone nozzle — accumulates a dense ring of earwax and debris that eventually breaks the tip's seal, causing both acoustic degradation and physical looseness. Charging contacts on wireless earbuds are vulnerable to the oxidative effects of sweat residue. The cable's outer insulation, particularly near connectors and housings, absorbs skin oils that accelerate rubber and plastic degradation.
For over-ear headphones, the ear cushions face the most aggressive contamination. They absorb sweat, skin oils, makeup, and hair products, and their porous materials — foam, fabric, faux leather — hold this contamination against the foam substrate where it degrades the foam's structure. The maintain earbud sound principle extends to all components, not just the acoustic pathway.
Does Regular Cleaning Extend Earphone Warranty or Longevity?
Cleaning doesn't extend or modify manufacturer warranty terms, but it does preserve the functional condition that makes warranty claims for genuine manufacturing defects distinguishable from user-caused damage. More practically: regular cleaning extends the actual functional lifespan of earphones well beyond what neglected equivalents achieve. Users who consistently maintain their equipment routinely get 3-5 years of good service from quality earphones; users who ignore maintenance often see significant performance degradation within 12-18 months.
The earbud care tips that matter most for longevity aren't elaborate — they're consistent. The same basic routine applied regularly prevents the accumulation events that cause irreversible damage.
What Tools and Materials Do You Need to Clean Earphones?
Effective earphone cleaning doesn't require expensive specialized equipment, though dedicated tools do improve results for thorough deep cleaning. The basic toolkit can be assembled entirely from items most households already have, and the upgrade to purpose-built tools is worthwhile for users who want the best results with minimal risk.
What Are the Best Household Items for Cleaning Earphones?
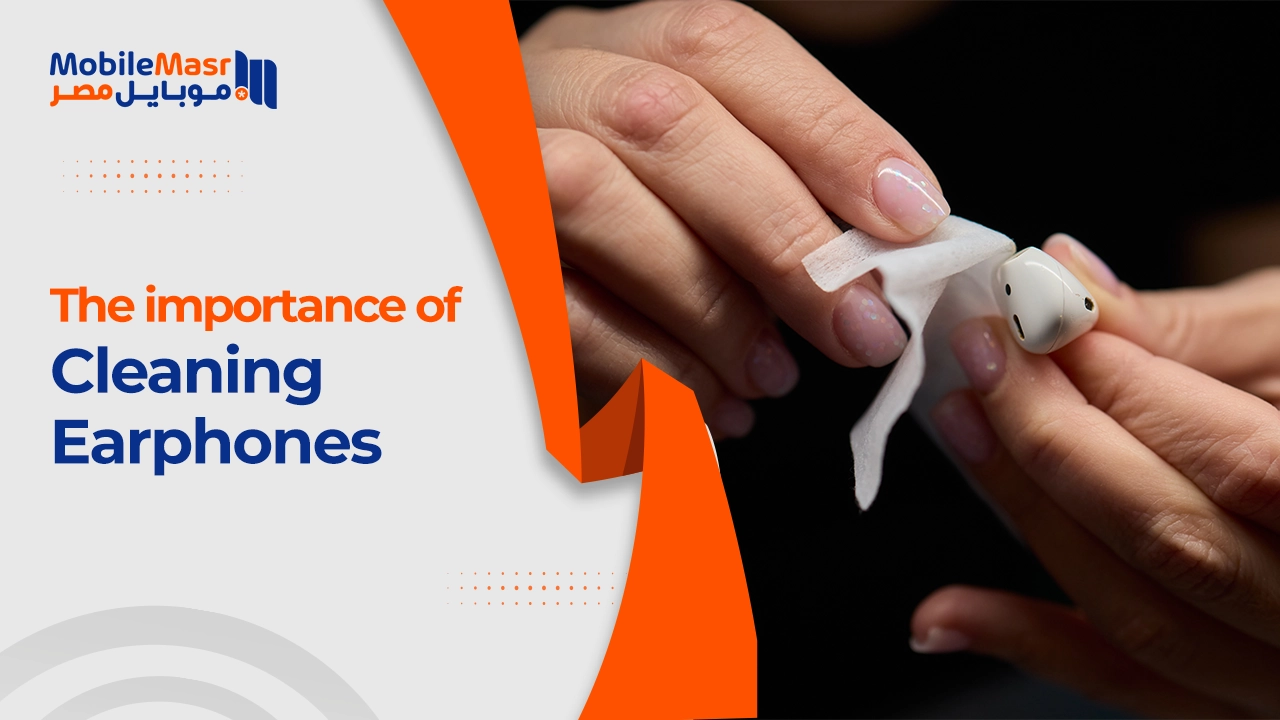
The most versatile household cleaning tools for earphones are: soft-bristle toothbrushes (new and unused), cotton swabs, microfiber cloths, wooden toothpicks, and isopropyl alcohol. Each serves a specific function in the cleaning process. The toothbrush's fine bristles are excellent for sweeping debris off mesh surfaces without pushing material inward. Cotton swabs apply controlled amounts of cleaning solution to specific areas with precision. Microfiber cloths wipe surfaces without scratching or leaving lint behind. Wooden toothpicks dislodge compacted material from ports and seams. Isopropyl alcohol (at 70%) serves as both a cleaning agent for oils and residue and a disinfectant for biological contamination.
Together, these items handle 90% of earphone cleaning needs across all earphone types. The headphone cleaning brush function is approximated effectively by a soft-bristle toothbrush, particularly one with angled bristles that can reach into mesh recesses. The key is using each tool for its appropriate purpose and avoiding applying too much pressure or too much liquid.
Can You Use Cotton Swabs to Clean Earphones Safely?
Cotton swabs are safe and useful for earphone cleaning when used correctly, but they carry a specific risk that must be avoided: pushing debris deeper into the mesh rather than removing it. The cylindrical shape of a cotton swab tip, when pressed directly against earphone mesh, creates a plunger effect that can compact earwax into the mesh openings rather than drawing it out. The correct technique is to use the swab at an angle, sweeping parallel to the mesh surface rather than pressing perpendicular to it.
For cleaning the housing surfaces, cable surfaces, and earphone tip attachment areas, cotton swabs are excellent tools — the cotton picks up oils and debris effectively when lightly dampened with isopropyl alcohol. For mesh cleaning specifically, a brush is usually preferable as the first tool, with the cotton swab reserved for follow-up cleaning of the surrounding area once the mesh has been cleared with a brush. The clean earbud mesh process benefits from this tool sequencing.
Is a Soft Toothbrush Good for Cleaning Earphone Mesh?
A soft-bristle toothbrush is one of the best available tools for cleaning earphone mesh precisely because its bristle geometry matches the cleaning challenge: fine, flexible bristles can sweep across the mesh surface efficiently, dislodging loose debris without applying enough localized pressure to push material through the mesh openings or deform the mesh structure. The brush should be completely dry when used on mesh — moisture on the bristles can carry dissolved earwax deeper into the mesh rather than removing it.
The technique matters: short, light strokes across the mesh surface (not into it) in one consistent direction, followed by positioning the earphone mesh-face-down and lightly tapping to dislodge loosened debris. After the dry brush step, a cotton swab with minimal isopropyl alcohol can address any remaining surface film. This sequence — dry brush, then minimal-moisture clean-up — handles the majority of regular mesh maintenance without any risk of water ingress. Remove debris earbuds care begins with this fundamental tool and technique combination.
What Professional Cleaning Tools Are Available for Earphones?
The professional earphone cleaning market has developed several product categories worth knowing about. Dedicated earphone cleaning kits combine multiple tools in a coordinated set — typically including specialized brushes with different bristle configurations for mesh versus housing, fine-pointed picks for removing compacted wax, microfiber cloths, and pre-measured cleaning solution. These kits eliminate the need to source individual tools and ensure everything present is appropriate for earphone use.
Cleaning putty or adhesive cleaning compounds (similar to Blu-Tack in consistency) are particularly valuable for mesh cleaning because they adhere to loose surface debris and pull it away from the mesh when removed, rather than pushing it further in. This is one of the most effective and safest approaches for mesh cleaning available. Some professional kits include this compound as a primary mesh cleaning tool.
What Is an Earphone Cleaning Kit and What Does It Include?
A complete professional earphone cleaning kit typically contains: a multi-bristle cleaning brush with at least two bristle configurations (stiff for housing, soft for mesh), fine metal or plastic picks for removing compacted debris from mesh and port openings, pre-moistened cleaning wipes calibrated at appropriate alcohol concentration (usually 70% isopropyl alcohol), dry microfiber cloths, cleaning putty or adhesive compound, and replacement ear tips in standard silicone sizes. Some premium kits include a UV sanitizing case that uses ultraviolet light to kill bacteria on surfaces without any chemical contact — particularly useful for wireless earbuds where liquid cleaning must be extremely controlled.
The headphone cleaning brush included in professional kits differs from a generic toothbrush in bristle density and handle design — the handle is typically ergonomic for the fine work of cleaning audio equipment, and the bristle configuration is optimized for audio product mesh rather than dental plaque removal. For users who clean earphones regularly and value thoroughness, a professional kit is a worthwhile investment. For occasional cleaning, the household toolkit serves adequately.
Are Ultrasonic Cleaners Safe to Use on Earphones?
Ultrasonic cleaners use high-frequency sound waves transmitted through a cleaning liquid to generate microscopic cavitation bubbles that dislodge contamination from surfaces and crevices inaccessible to manual tools. They're highly effective for cleaning metal components like jewelry and dental instruments. For earphones, the answer requires careful qualification.
Ultrasonic cleaning of silicone ear tips (detached from the earphone and submerged alone) is safe and highly effective — the silicone is not damaged by ultrasonic cleaning, and the process removes earwax from micro-crevices more thoroughly than any manual method. However, submerging an assembled earphone (including driver, cable, or electronics) in an ultrasonic cleaner is potentially damaging. The cavitation process can penetrate seals, the cleaning liquid contact with drivers causes immediate damage, and the mechanical vibration can stress solder connections. Ultrasonic cleaning should be limited to detachable components only, and even then only components confirmed to be non-electronic.
Which Cleaning Solutions Are Safe to Use on Earphones?
Isopropyl alcohol at 70% concentration is the gold standard for earphone cleaning. It's effective against a broad spectrum of bacteria and viruses, dissolves lipid-based contamination (earwax and skin oils), evaporates quickly without leaving residue, and is safe for the plastics, silicones, and metals used in earphone construction at this concentration. The alcohol wipes earphones cleaning approach uses pre-saturated wipes calibrated to this concentration for controlled, convenient application.
The concentration matters: 90%+ isopropyl alcohol evaporates so quickly that contact time may be insufficient for effective disinfection, and it can be more aggressive toward certain plastic coatings. Below 60%, the disinfection efficacy is significantly reduced. The 70% concentration represents the optimal balance of disinfection effectiveness, material compatibility, and evaporation behavior.
Can You Use Isopropyl Alcohol to Clean Earphones?
Yes — 70% isopropyl alcohol is appropriate for cleaning most earphone surfaces including housings, cables, silicone ear tips (when detached), charging cases, and exposed contact areas. Application should be through a cloth, swab, or wipe rather than direct spray or dripping, which could introduce excessive liquid near drivers or into charging ports. The earphone hygiene routine built around isopropyl alcohol is safe, effective, and well-suited to the biological contamination that earphones accumulate.
The one exception to IPA's broad safety is the mesh screen itself: applying isopropyl alcohol directly to the mesh, particularly with any pressure, can carry dissolved earwax deeper into the acoustic channel. The mesh should be cleaned primarily with dry tools, with IPA reserved for the surrounding housing area where it can't migrate inward.
Is Hydrogen Peroxide Safe for Cleaning Earphone Tips?
Hydrogen peroxide at 3% (the standard consumer pharmacy concentration) can be used for soaking detached silicone ear tips as a disinfection method — it provides broad antimicrobial activity and is safe for silicone. However, there are important limitations. Hydrogen peroxide should not be applied to the earphone housing or driver area, as it can oxidize metallic components and degrade certain plastic finishes. It also produces a bubbling reaction when it contacts organic material (earwax, skin debris), which can temporarily appear alarming but is the expected oxidative reaction indicating it's working.
For routine ear tip cleaning, isopropyl alcohol is preferable because it's faster, leaves no residue requiring rinsing, and is equally effective. Hydrogen peroxide is best reserved for disinfection scenarios where a more thorough antimicrobial action is desired — after illness, after sharing between multiple users, or for earphones that have been stored for extended periods. Always rinse thoroughly with clean water after hydrogen peroxide treatment and allow complete drying before reattachment. Clean silicone ear tips with this approach whenever enhanced disinfection is the goal.
Can You Use Water to Wash Earphone Silicone Tips?
Warm water with a mild dish soap is safe and effective for washing detached silicone ear tips — silicone is chemically inert and undamaged by water or mild soap. Thorough rinsing is essential to remove all soap residue, which can be irritating in the ear canal if left on the tip's surface. After washing, pat dry with a lint-free cloth and allow to air dry completely before reattaching — typically 15-20 minutes in normal conditions.
Water should be strictly limited to detached silicone tips and should never contact the earphone driver, charging ports, or electronic components unless the specific earphone has a water resistance rating that explicitly covers immersion. Even for earphones with IPX ratings, water ingress through the earphone tip opening can reach the driver directly, bypassing any water resistance sealing. The earphone care instructions for all earphone types distinguish clearly between what their water resistance protects (external surface spray or rain) and what it doesn't protect (water forced through the sound opening).
What Cleaning Materials Should You Never Use on Earphones?
The materials to avoid when cleaning earphones are those that damage surfaces, introduce inappropriate amounts of liquid, or use abrasive action inappropriate for delicate audio components. The most important prohibitions: bleach and bleach-based products, acetone or nail polish remover, hydrogen peroxide directly on electronics or metal components, paper towels (which are mildly abrasive and leave lint), rough cloths or abrasive pads, and excessive amounts of any liquid.
Why Should You Avoid Bleach or Harsh Chemicals on Earphones?
Bleach (sodium hypochlorite) is corrosive to the metals, rubber, and plastics used in earphone construction. At concentrations effective for disinfection, it degrades silicone, causes metallic corrosion on speaker grilles and contacts, bleaches and weakens rubber cable insulation, and can degrade the adhesive bonds that hold earphone housings together. The chemical aggression of bleach is entirely disproportionate to the contamination challenge that earphones present, and safer, equally effective alternatives (isopropyl alcohol) make bleach use unjustifiable.
Acetone is similarly aggressive — it dissolves many plastics used in earphone housings and removes protective coatings from cables and connectors. Ammonia-based products (glass cleaners) can cloud plastic surfaces and degrade rubber components. The headphone maintenance tips that emphasize mild cleaning agents over powerful ones reflect the sensitivity of earphone materials to chemical attack. The rule is: if you wouldn't be comfortable with the chemical contacting your ear, it probably shouldn't contact the earphone that goes in your ear.
Can Paper Towels or Rough Cloths Scratch Earphone Surfaces?
Paper towels have a rougher surface texture than they appear — their cellulose fiber structure creates microscopic abrasive points that can scratch glossy plastic housings and specialized coatings when used with any pressure. For earphone surfaces with smooth, glossy, or soft-touch coatings, paper towels leave fine scratches that accumulate into visible surface damage over repeated cleanings.
Microfiber cloths are the correct alternative — their fiber structure captures and holds particles rather than dragging them across the surface, eliminating the abrasion mechanism. For earphone cleaning, always use microfiber cloths or purpose-made cleaning cloths rather than paper products, tissues, or general-purpose wipes that have surface textures inappropriate for precision electronics. This is a headphone maintenance tip that seems minor but has visible long-term consequences for earphone appearance.
How Do You Clean Wired Earphones Step by Step?
Wired earphones have three distinct zones that require different cleaning approaches: the earphone housing and mesh, the cable, and the connector. Each zone has specific vulnerabilities and appropriate cleaning methods. Treating all three zones as part of a unified cleaning session takes under 10 minutes and covers all maintenance needs.
How Do You Clean the Earphone Mesh or Grille on Wired Earphones?
The mesh cleaning process for wired earphones follows a dry-to-damp sequence that maximizes debris removal while protecting the driver behind the mesh. Begin with a completely dry soft-bristle toothbrush, holding the earphone with the mesh facing downward. Use short, light strokes across the mesh surface — the downward orientation means that loosened debris falls away from the driver rather than into it. This dry brushing step removes the bulk of surface earwax and debris.
After dry brushing, use a piece of cleaning putty or slightly sticky adhesive material (pressed gently against the mesh and pulled away) to lift any remaining surface debris that the brush has dislodged but not removed. Inspect the mesh under a bright light or phone flashlight — if openings remain blocked, a second brush pass or a gentle wooden toothpick (used at a very shallow angle along the mesh surface, not poked perpendicular into it) can address stubborn deposits without the push-through risk.
Only after mechanical cleaning is complete should any liquid be introduced, and only to the surrounding housing — a cotton swab lightly moistened with 70% IPA wipes the housing perimeter around the mesh without risking liquid entry. The clean earbud mesh result should show open, unobstructed mesh apertures under inspection. If blockage persists through these steps, the wax has hardened inside the acoustic channel and may require the deep cleaning approach described later.
How Do You Remove Earwax from a Tiny Earphone Mesh Without Damaging It?
Earwax that has dried and hardened in mesh openings requires a softening step before mechanical removal becomes effective. Gentle heat from holding the earphone in a closed palm for 30-60 seconds can partially soften dried earwax, making it more receptive to brush removal. For more stubborn hardened wax, a single drop of warm water placed on a cotton swab (not on the mesh itself) and then the damp swab held briefly near (not touching) the mesh can provide enough moisture to soften surface deposits without introducing liquid to the driver area.
After softening, the dry toothbrush technique removes the softened material. The critical principle throughout is: work outward from the mesh surface, never inward. Any tool motion that pushes debris toward the mesh center and perpendicular to the mesh plane risks pushing it through the mesh into the acoustic channel. All cleaning motions should be lateral (sweeping across the mesh surface) or outward. Remove earwax from earbuds with this directional discipline and the mesh can be thoroughly cleaned without ever introducing contaminants deeper into the earphone.
What Is the Best Way to Unclog a Blocked Earphone Grille?
A completely blocked earphone grille — where sound is severely reduced or absent from one side — requires the most thorough approach available before considering the earphone a write-off. After standard dry brushing, cleaning putty application, and gentle warming have been exhausted, a professional earphone cleaning pick tool (fine metal or plastic point) can be used to very carefully break up hardened wax deposits at individual mesh openings. The technique requires working under good lighting, ideally with magnification, with extremely light touch — the mesh deforms under very little force and a punctured mesh cannot be repaired.
For earphones where the grille is removable (some in-ear monitor styles have serviceable nozzle screens), removing the screen and replacing it with a fresh one from the manufacturer's spares catalog is often the cleanest solution for severe blockage. This transforms an irreversible cleaning challenge into a straightforward part replacement. The earphone care instructions for serviceable earphones specifically mention nozzle screen replacement as a maintenance service, and spare screens are often available inexpensively.
How Do You Clean the Earphone Cable Without Damaging It?
The earphone cable is a continuous skin-contact surface that accumulates body oils, sweat, and environmental grime along its entire length. Beyond being unhygienic, this accumulation degrades the cable's outer insulation over time, making it brittle and prone to cracking — particularly at stress points near the Y-split and connector entry points. Clean earphones safely includes cable maintenance as a standard component.
The cable cleaning process: fold a microfiber cloth once and lightly dampen one section with 70% isopropyl alcohol. Run the cable between the cloth's folded surfaces from the earphone end to the connector end, applying light pressure — this wipes all sides of the cable simultaneously in a single smooth pass. The IPA dissolves and removes the oil film without introducing excess moisture. Follow with a dry section of the cloth in the same motion. The entire cable can be cleaned in a single pass this way.
Does Cleaning the Cable Help Prevent Wire Breakage?
Yes — the mechanism is indirect but real. The oils absorbed by cable insulation break down the polymer chains in rubber and PVC insulation materials at an accelerated rate compared to clean cables. This degradation causes the insulation to become progressively less flexible, losing its ability to flex and recover at the micro-scale. When a stiffened cable is bent at a stress point — like the constant bending near the connector where the cable exits the earphone — the degraded insulation cracks rather than flexes, eventually exposing or breaking the internal conductors.
Regular cable cleaning removes the contamination that accelerates this degradation process. Combined with proper storage (gentle coiling rather than tight wrapping, no hard kinking at stress points), cable maintenance meaningfully extends the life of wired earphones. The headphone maintenance tips for cables are simpler and less frequent than mesh maintenance but equally important for long-term earphone longevity.
How Do You Remove Sticky Residue from an Earphone Cable?
Sticky residue on earphone cables often comes from one of two sources: degraded cable insulation releasing plasticizer compounds (which gives cables a tacky, oily feel that doesn't clean off with standard methods), or transferred adhesive from stickers, labels, or tape that the cable contacted. These require different approaches.
For external adhesive residue: a cotton swab with a small amount of 70% IPA applied with light pressure and a rolling motion (not a dragging scrub) dissolves and removes most adhesive residues without damaging the cable surface. For cables that have developed intrinsic tackiness from insulation degradation (the stickiness persists even after thorough cleaning), the cable material itself has chemically changed — this is not a cleaning problem but a material aging issue, and while cleaning can reduce the surface stickiness temporarily, it will return because the source is internal to the cable material.
How Do You Clean the Earphone Jack on Wired Earphones?
The 3.5mm audio jack at the end of a wired earphone is a contact-bearing connector that accumulates lint, dust, and oxidation on its contact rings. When plugged into a device, any contamination on the jack contacts creates a small electrical resistance that can cause channel imbalance, crackling, or audio dropout. Regular jack cleaning is part of complete wired earphone maintenance.
The safest method: a cotton swab or pipe cleaner sized appropriately for the jack diameter, completely dry, rotated inside the jack to physically remove loose lint and dust. Follow with a very lightly IPA-dampened swab to address contact oxidation — the IPA dissolves the thin oxidation film on the gold or nickel contacts and evaporates completely before any connection is made. Allow full evaporation (30-60 seconds) before plugging in.
Can Dirt in the Audio Jack Cause Poor Sound Quality?
Absolutely — the audio signal from your phone to your earphones travels entirely through the electrical contacts in the jack/socket connection. Any contamination creating resistance at these contacts affects the signal before it reaches the earphone driver. Oxidation on the contact rings creates increased impedance that can cause high-frequency rolloff (the signal above certain frequencies experiences more resistance). Lint or debris physically separating the contacts causes intermittent connection — manifesting as crackling, channel dropout, or complete silence.
The clean earphones safely principle for jack maintenance means addressing the jack as a functional component, not just an appearance component. A jack that looks clean externally can have contamination on its contact rings that meaningfully affects sound quality. The cotton swab cleaning method described above addresses both visible debris and contact surface oxidation.
What Is the Safest Tool to Clean the 3.5mm Earphone Jack?
The safest tool for 3.5mm jack cleaning is a dry, soft cotton swab of appropriate diameter — sized so it contacts the jack walls without jamming. The cotton material picks up loose lint and dust effectively without scratching the contact rings. For a more thorough clean, a pipe cleaner sized for 3.5mm jacks is available from electronics stores and provides better contact with the jack's internal geometry than a cotton swab.
Metal tools (toothpicks, pins) should be avoided inside audio jacks — the contact rings are plated metal that scratches easily, and scratching the contacts damages their electrical properties. Compressed air can help dislodge loose debris from the jack before swab cleaning, but should be used carefully at an appropriate distance to avoid forcing debris deeper into the connector. The earphone care instructions principle of using soft tools for contact areas protects the most electrically sensitive part of the wired earphone.
How Do You Clean the Earphone Controls and Microphone on Wired Earphones?
The inline remote control and microphone on wired earphones present a specific cleaning challenge because they combine mechanical button components (which need to be pressed and move freely) with a microphone port (which is a small mesh-covered opening that must remain acoustically transparent). Both components accumulate skin oils, lint, and debris at high rates due to their placement against the user's clothing and skin.
Can Moisture Damage the Inline Microphone During Cleaning?
The inline microphone is covered by a fine mesh or small opening that provides a direct acoustic pathway to the microphone element inside — and also a potential water ingress pathway. The microphone element itself is typically not sealed, meaning moisture that enters through the port can damage it. This means liquid cleaning of the microphone area must be extremely controlled — a cotton swab with minimal IPA moisture, applied to the surrounding housing and not to the microphone port itself.
For the microphone port, the dry brush technique (short strokes with a soft toothbrush across the port surface) addresses lint and debris without any moisture risk. The button mechanisms on inline controls can be cleaned with a lightly IPA-dampened microfiber cloth or swab — avoiding pressing liquid into the button gap where it could reach the circuit board inside. Remove dirt from earbuds controls with this careful approach to protect the most electronically vulnerable part of wired earphone systems.
How Do You Clean Wireless and Bluetooth Earphones?
Wireless earphones introduce additional cleaning considerations beyond those for wired models: charging contacts, charging cases, sensors for features like automatic ear detection and ANC, and the complete absence of a cable that needs attention. The fundamental principles remain the same, but the execution adapts to the specific components present.
How Do You Clean True Wireless Stereo (TWS) Earbuds Like AirPods?
TWS earbuds require cleaning in two distinct phases: the earbud units themselves and the charging case. The earbud cleaning follows the general mesh-first approach, with the additional consideration of charging contacts on the earbud stems that need to remain clean for reliable charging. Wireless earbuds cleaning is fundamentally similar to wired earbud cleaning for the earbud itself, with the addition of contact and case maintenance.
For the earbuds: remove silicone tips (if present), dry brush the mesh, clean the housing with a microfiber cloth lightly dampened with IPA, and use a cotton swab to clean the charging contact area on the stem. The mesh cleaning follows the same downward-facing, outward-brushing technique described for wired earphones. The IPA evaporates quickly and won't damage the earbuds if used in the minimal quantities appropriate for swab and cloth application.
How Do You Clean the AirPods Charging Case Without Breaking It?
The AirPods charging case has several vulnerable areas: the charging port at the bottom (where lint accumulates, affecting charging reliability), the inner cavity where the earbuds sit (which accumulates earwax transferred from the earbuds), the charging contacts in the inner cavity (small metal points that must remain conductive), and the exterior surface (which collects fingerprints and oils).
Apple specifically advises against getting moisture in the charging port and avoiding sharp objects in any of the case's openings. For the interior: dry cotton swabs rotated against the walls and around the charging contacts remove debris without moisture risk. The charging contacts themselves can be cleaned with a barely damp IPA swab — extremely minimal moisture — to address oxidation. The exterior responds well to microfiber cloth with light IPA dampness. For the charging port specifically, a dry wooden toothpick to dislodge compacted lint, followed by a short burst of compressed air, is the safest approach. Clean AirPods tips and cases using these material-specific methods rather than applying the same technique universally. The wireless earbuds cleaning protocol for the case requires this level of component-specific care.
What Is the Safest Way to Clean AirPods Mesh and Speaker Grilles?
AirPods feature several distinct mesh areas: the main speaker mesh, the microphone mesh, and on Pro models, the ear tip mesh. Each requires the same fundamental dry-first approach but with awareness of AirPod-specific vulnerabilities. AirPods' internal components are not fully sealed, meaning any liquid that penetrates the mesh can damage the driver or microphone directly.
The recommended approach for AirPod mesh cleaning: a dedicated AirPod cleaning brush or equivalent soft-bristle toothbrush using light, sweeping motions with the earphone held mesh-down. Cleaning putty pressed gently against the mesh and carefully peeled away is highly effective for surface earwax removal. The key caution is avoiding any liquid application to the mesh itself — even IPA should not be applied directly to any AirPod mesh area. The clean AirPods tips protocol from Apple itself follows this dry-cleaning principle for the mesh surfaces specifically.
How Do You Clean Over-Ear Wireless Headphones?
Over-ear headphones present the largest surface area of any earphone type and accumulate grime across a broader range of surfaces: ear cushions, headband padding, driver housings, cable connections (where applicable), and controls. The cleaning challenge is managing several different material types simultaneously — often fabric or leather ear cushions, plastic or metal housings, rubber headband padding, and exposed metal contacts or buttons.
How Do You Clean the Ear Cushions on Wireless Headphones?
Ear cushion cleaning depends on the cushion material. For faux leather (the most common material on wireless headphones): a microfiber cloth lightly dampened with 70% IPA wipes the surface effectively, removing sweat, skin oils, and makeup residue. The IPA evaporates quickly and doesn't damage the faux leather surface at this concentration.
For fabric ear cushions: use a dry soft brush first to remove loose debris and surface lint, then a barely damp cloth with very light IPA to address oil staining. Fabric is more absorbent than faux leather and retains moisture, so minimal liquid application is important to prevent moisture from reaching the foam beneath the fabric cover. After any liquid cleaning, allow cushions to air dry completely before using the headphones. The headphone hygiene concern with ear cushions is significant because they accumulate sweat and oils at high rates and are in direct facial contact.
Can You Remove and Wash the Ear Pads on Wireless Headphones?
Many over-ear headphones feature removable ear pads, typically attached via clips, twist-lock, or magnetic connectors. For headphones with this design, removing the ear pads allows more thorough cleaning of both the pad itself and the driver housing beneath.
Faux leather ear pads (detached): wipe with IPA-dampened cloth, allow to dry. Fabric ear pads (detached): gentle hand wash in lukewarm water with mild soap, thorough rinse, and air dry completely before reattachment — typically 12-24 hours. Do not machine wash ear pads; the agitation can separate the fabric from the foam substrate. Memory foam pads should not be submerged — wipe the fabric surface only. Reattach only when completely dry. The headphone maintenance tips for detachable cushions take advantage of the maintenance design feature that manufacturers include specifically to extend product life through this periodic deep cleaning.
How Do You Clean the Charging Pins on Wireless Earbuds?
Charging pins on wireless earbuds are small, precise electrical contacts that must maintain low resistance connections for efficient charging. They're located in the earphone case cavity and accumulate transferred earwax and debris from the earbud body every time the earbuds are returned to the case. The earbud care tips for charging contact maintenance are straightforward but easy to overlook.
Does Dirt on Charging Pins Affect Battery Charging Speed?
Yes — contamination on charging contacts creates electrical resistance that reduces the current flow during charging. In the most affected cases, the earbud may fail to charge at all (the contact resistance is too high for reliable connection), but more commonly the effect is slower-than-expected charging or intermittent charging behavior (the buds charge partially and then stop when the contact is lost due to earbud movement).
Earwax is particularly problematic because it's an electrical insulator — even a thin film over a charging pin can prevent the electrical connection entirely. This is why earphones that were charging fine for months suddenly develop charging problems: the earwax film has been building up gradually and finally reached the threshold that breaks reliable connection. Regular charging pin cleaning prevents this trajectory from developing.
What Tool Is Best for Cleaning Earphone Charging Contacts?
The best tool combination for earphone charging contacts is: a wooden toothpick for gently dislodging any visible wax or debris, followed by a cotton swab barely moistened with IPA to dissolve and remove any residual film from the contact surface. The toothpick provides the controlled mechanical action to break up hardened deposits without risk of scratching the contact plating the way a metal tool would. The minimal IPA application dissolves the oxidation and organic residue that the toothpick loosens.
The contacts should be visibly clean and slightly shiny when properly maintained. After IPA cleaning, allow full evaporation before placing the earbuds in the case to prevent moisture-related charging issues. The headphone maintenance tips for contacts emphasize this evaporation step specifically because charging current through wet contacts can accelerate corrosion of the contact plating.
How Do You Clean Earphones with Active Noise Cancellation (ANC) Sensors?
ANC earphones contain additional microphones — typically located on the outer housing facing outward — that capture ambient sound for the noise cancellation algorithm to process. These external microphones have small acoustic ports that are subject to the same debris accumulation as any other small opening on the earphone body. Unlike internal speaker drivers, ANC microphones face the environment rather than the ear canal, so their contamination profile is dust and environmental debris rather than earwax.
Can Cleaning ANC Microphones Improve Noise Cancellation Performance?
Yes — if an ANC microphone port is partially blocked by debris, the ambient sound signal captured by that microphone is attenuated, reducing the accuracy of the noise cancellation algorithm's response. The ANC system processes the difference between ambient noise captured by the external microphone and internal sounds captured by an inner microphone; a contaminated external microphone skews this comparison, reducing cancellation effectiveness.
Cleaning the ANC microphone ports follows the same dry-brush-first principle as speaker mesh cleaning: soft-bristle brush using light strokes across the port, dry cotton swab to remove loosened debris, no direct liquid application to the port itself. Given that ANC microphones face the environment, they tend to collect more dust and fine environmental particles than earwax, making the brush approach particularly effective. After cleaning, the ANC performance often noticeably improves in the higher frequency ranges where microphone sensitivity degradation from contamination is most apparent. Regular cleaning earphones sessions that include ANC port maintenance protect both sound quality and noise cancellation performance simultaneously.
How Do You Clean Different Types of Ear Tips and Ear Cushions?
Ear tips and cushions are the components with the most intimate skin contact and the highest biological contamination load — they're worth cleaning most frequently and most thoroughly. The appropriate cleaning method varies significantly with material type.
How Do You Clean Silicone Ear Tips on In-Ear Earphones?
Silicone ear tips are the easiest earphone component to clean thoroughly because silicone is chemically resistant, dimensionally stable when wet, and completely safe for immersion. Remove the tips from the earphone nozzle — most silicone tips detach with a gentle pull or twist. Inspect for visible earwax buildup both on the outer surface and inside the bore.
For regular cleaning: warm water with a drop of mild dish soap, worked into the tip surface by gentle rubbing between fingers, then thoroughly rinsed. Allow to air dry on a clean surface for 15-20 minutes before reattaching. For deeper disinfection: soak in 70% isopropyl alcohol for 30 seconds, remove and wipe, allow complete alcohol evaporation. The clean silicone ear tips result should be visibly clean, odor-free, and pliable. If tips have become stiff or have surface degradation (cracks, tackiness) despite cleaning, replacement is appropriate.
Can You Boil Silicone Ear Tips to Sterilize Them?
Silicone is thermally stable at temperatures well above boiling water (typically rated to 200°C or higher), so the material itself survives boiling without damage. Brief boiling (2-3 minutes) does achieve sterilization of biological contamination. However, there are practical considerations: boiling softened wax may redistribute contamination across the tip's interior surface rather than removing it, and minerals in tap water can leave deposits on the silicone surface as it dries.
If boiling is used, ensure the tips are mechanically clean of visible earwax before boiling (physical removal first, then thermal sterilization), use distilled water to prevent mineral deposits, and allow to dry completely on a clean surface. Boiling is most appropriate for tips that need sterilization after illness or use by multiple people. For routine earphone hygiene maintenance, isopropyl alcohol is faster, equally effective, and doesn't require heating equipment.
How Do You Dry Silicone Ear Tips After Washing?
Pat the tips lightly with a clean lint-free cloth to remove surface moisture, then stand them upright on a clean microfiber cloth or paper towel in a well-ventilated area for 15-20 minutes. This is sufficient for complete drying in normal ambient conditions. Avoid using heat sources (hairdryer, microwave, oven) to accelerate drying — while silicone tolerates heat well, hot air can deform the thin sections of ear tips and affect their fit and seal quality.
Reattach the tips only when fully dry, both inside and out. Moisture in the bore of the ear tip can wick into the earphone nozzle when the tip is attached and used, potentially reaching the driver. The earbud care tips for drying emphasize this caution because water in the driver area causes irreversible damage.
How Do You Clean Foam Ear Tips Without Destroying Them?
Foam ear tips — particularly memory foam — are the most delicate ear tip material to clean because their function depends on the integrity of an open-cell foam structure that collapses and expands to conform to the ear canal. This foam structure is highly vulnerable to mechanical stress (squeezing and twisting), chemical attack (many solvents dissolve polyurethane foam), and moisture penetration (water absorbed by foam is difficult to fully evaporate and can promote mold growth).
Can Foam Ear Tips Be Washed with Water?
Foam ear tips should generally not be submerged or rinsed under running water. The foam absorbs water immediately and completely, and the water replaces the air in the foam cells that allows the expansion behavior. Once saturated, foam tips take very long to dry completely, and any moisture remaining inside the foam can promote mold and bacterial growth. More importantly, wetting foam tips tends to change their expansion properties — they may become slower-expanding or less conformable after thorough wetting and drying.
For cleaning foam tips, the appropriate approach is surface-only: a cotton swab barely dampened with IPA (wiped on the outside of the foam surface, not saturated) can address surface contamination without penetrating deep into the foam. Allow complete IPA evaporation before use. The surface cleaning approach won't address contamination inside the foam cells, which is why foam ear tips have a fundamentally shorter hygienic service life than silicone tips. The earphone maintenance guide principle for foam tips acknowledges this limitation explicitly.
When Should You Replace Foam Ear Tips Instead of Cleaning Them?
Replace foam ear tips when: they no longer expand to full size within 20-30 seconds of insertion, they've developed visible discoloration or staining that surface cleaning doesn't address, they retain odor after cleaning (indicating deeply embedded organic contamination), they're visibly torn or have irregular surface texture, or they've been used for more than 30-60 days with daily use. Foam tips are inherently consumable components with a shorter replacement interval than silicone tips. Most manufacturers offer foam tip replacement sets for this reason. The headphone maintenance tips for foam users prioritize regular replacement over extended cleaning cycles.
How Do You Clean Leather or Faux Leather Ear Cushions?
Leather and faux leather ear cushions require different treatment to account for their fundamentally different material properties. Genuine leather is a natural material that contains oils essential to its structure and flexibility — cleaning must remove surface contamination without stripping these oils. Faux leather (polyurethane-coated fabric) doesn't have oil requirements but is vulnerable to cracking if the PU coating is chemically degraded.
What Leather Conditioner Is Safe to Use on Earphone Cushions?
For genuine leather ear cushions: after cleaning with a specialized leather cleaner or lightly damp cloth, apply a small amount of leather conditioner (fragrance-free, colorless formulas are preferable for headphone use) to a cloth and work it into the leather surface in circular motions. This replaces the oils that cleaning removes and maintains the leather's flexibility, preventing the drying and cracking that develops in unconditioned leather over time.
For faux leather: conditioning products designed for genuine leather are unnecessary and may actually be counterproductive — the PU coating doesn't absorb conditioning oils the way genuine leather does. Clean faux leather with IPA-dampened cloth and allow it to air dry; no conditioning is needed. The distinction between genuine and faux leather for earphone cushion maintenance matters because applying the wrong treatment does nothing for faux leather and genuine leather needs treatment that faux leather doesn't.
How Do You Prevent Leather Ear Pads from Cracking After Cleaning?
Leather cracking occurs when the leather's moisture and oil content drops too low, making the collagen fibers brittle. The prevention is maintaining adequate oil content through regular conditioning and avoiding the cleaning methods that most aggressively strip oils — primarily alcohols and harsh detergents applied directly to the leather surface.
When cleaning is necessary, use the minimal effective amount of cleaning agent, allow thorough drying, and apply conditioner promptly after. Store headphones with leather cushions in environments with moderate humidity — very dry storage environments (heated rooms in winter) accelerate leather drying between cleanings. The headphone hygiene routine for leather cushions therefore includes both the cleaning component and the conditioning component as inseparable parts of the same process.
How Do You Clean Fabric or Mesh Ear Cushions?
Fabric ear cushions are the most absorbent material type, making them effective at retaining both contamination and moisture. They require a more careful approach than faux leather because over-wetting can promote mold growth in the foam beneath the fabric.
Can Fabric Ear Pads Be Machine Washed?
Detached fabric ear pads from certain headphone models can be hand-washed in cool water with mild soap, but machine washing is generally inappropriate. The agitation in a washing machine can separate the fabric from the underlying foam adhesive, cause foam compression that doesn't fully recover, and damage any embedded structural components (like the ring that clips the cushion to the headphone). Hand washing provides control over water pressure, temperature, and mechanical agitation that machine washing cannot.
For hand washing detached fabric pads: cool water, minimal mild soap, gentle kneading action (not wringing or twisting), thorough rinsing to remove all soap, and air drying completely flat before reattachment. A drying period of 12-24 hours ensures the foam beneath the fabric is fully dry. The headphone maintenance tips for fabric cushions emphasize complete drying as the most important step — partially damp foam cushions pressed against the ear during use create an ideal environment for bacterial and fungal growth.
How Do You Remove Sweat Stains from Fabric Ear Cushions?
Sweat stains on fabric ear cushions result from salt and metabolic compounds in sweat that deposit as the water evaporates, leaving a white or yellowish ring-shaped discoloration. For fresh sweat stains: a damp cloth blotted (not rubbed) against the stained area, followed by air drying, is often sufficient. For set-in stains: a diluted mixture of distilled white vinegar and water (1:3 ratio) applied with a cloth and blotted repeatedly can break down the salt deposits without damaging the fabric.
After stain treatment, ensure thorough drying before use. For headphones with particularly sweat-absorptive fabric cushions, using removable, washable cushion covers (available as aftermarket accessories for many popular headphone models) provides a washable protective layer over the more delicate original cushion, extending the interval between stain-formation events and making maintenance easier. The earphone care instructions for sweat management recommend these covers specifically for athletes and users in hot climates.
How Do You Clean Earphones After Sweating or Working Out?
Post-exercise cleaning represents the most time-sensitive earphone maintenance scenario. Sweat is a complex fluid containing salt, lactic acid, urea, and ammonia compounds that are corrosive to electronic components and destructive to adhesive bonds at the concentrations produced during intense exercise. The window for effective damage prevention is the period immediately after exercise, before sweat dries and its compounds concentrate on earphone surfaces.
Why Is It Especially Important to Clean Earphones After Exercise?
Fresh sweat on earphone surfaces is relatively dilute and can be wiped away easily with a cloth, removing the corrosive compounds before they have any opportunity to act on the materials. Dried sweat is a different matter — the water evaporates but the dissolved compounds remain, concentrated. Dried sweat on metal contacts, cable connectors, and housing adhesive bonds means concentrated acids (lactic acid) and alkaline compounds (ammonia from urea decomposition) in direct contact with vulnerable materials.
The earphone maintenance guide for active users treats post-exercise cleaning as time-sensitive maintenance rather than optional hygiene practice. The difference between wiping earphones immediately after exercise and waiting a day is the difference between removing a soluble contaminant and having to remove a dried, partially reactive residue that has already begun interacting with the earphone materials.
How Does Sweat Corrode Earphone Internals Over Time?
Sweat that penetrates earphone housing seals — which become progressively less effective as they age and sustain thermal cycling from temperature changes during exercise — reaches the driver, internal circuitry, and cable connections inside the housing. The salt in sweat causes galvanic corrosion between different metals (solder joints, contact pins, voice coil wires). The acid content attacks adhesive bonds that hold the driver assembly and cable connections in place. The moisture itself causes electrical shorts and oxidation of circuit board traces.
The progression is gradual but irreversible once started: initial symptoms are channel imbalance or intermittent connection, followed by crackling distortion, followed eventually by complete functional failure. This is why earphones with good water resistance ratings significantly outlast non-rated earphones in active use environments — the sealing prevents the initial sweat ingress that begins this degradation sequence. The earbud care tips for fitness use emphasize rating-appropriate use and post-exercise cleaning as the two most important protective practices.
Can Sweat Void an Earphone's Warranty?
Many earphone manufacturers specifically exclude sweat damage from their warranty coverage, even for products marketed for sports use. The distinction between a "sports earphone" and an "IPX-rated earphone" is important: marketing language doesn't equal engineering specification. Without an explicit IPX water resistance rating and the testing that backs it, sweat damage may not be covered.
For earphones with IPX ratings, the rating defines the degree of protection against specific types of water exposure: IPX4 is splash-resistant, IPX5 is jet-resistant, IPX7 is submersion-resistant. However, sweat isn't plain water — its chemical composition can degrade seals faster than fresh water, and some manufacturers note that sweat exposure voids IPX-related warranty claims. Maintaining clean earphones through consistent post-exercise cleaning reduces the total sweat exposure the earphones experience and helps preserve any applicable warranty.
What Is the Best Way to Clean Sports Earphones After a Workout?
The optimal post-workout cleaning sequence is: immediately on removing the earphones, wipe all surfaces (housing, cable, connectors) with a dry microfiber cloth to physically remove the bulk of the sweat while it's still liquid. For the mesh surfaces, the downward-facing dry brush technique is appropriate even in this context — removing sweat from the mesh surface before it dries there. Allow the earphones to air dry completely in an open position (not in their case) before storage.
For a complete clean, follow the dry wipe with an alcohol wipe earphones treatment on all non-mesh surfaces once the earphones have air-dried for a few minutes. The disinfect earphones step is particularly important for post-exercise cleaning because sweat creates an ideal bacterial growth environment on earphone surfaces. Antibacterial wipes formulated at appropriate alcohol concentrations (70% IPA) are well-suited for this use.
How Do You Disinfect Earphones After Sharing Them with Someone?
Sharing earphones creates a direct biological transfer pathway between users' ear canals — potentially including bacteria, fungi, and viruses that are specific to the first user's microbiome. The clean earphones safely protocol for post-sharing disinfection is more thorough than routine personal cleaning.
Process: remove ear tips and clean them separately (IPA soak for silicone, surface wipe for foam). Clean the mesh with dry brush technique. Wipe all housing, cable, and connector surfaces with 70% IPA on a microfiber cloth. For UV sanitizer devices, a 10-minute UV treatment provides an additional disinfection layer without any liquid contact risk. Allow complete air drying before the new user inserts them. This process addresses the primary concern — biological contamination on the ear contact surfaces — comprehensively. The headphone hygiene importance of this protocol cannot be overstated for health protection.
Are Antibacterial Wipes Safe to Use on Sports Earphones?
Antibacterial wipes calibrated to 70% isopropyl alcohol are safe for use on most earphone surfaces including housing, cables, and ear tip surfaces. The concerns are: avoiding the mesh surfaces (liquid application to mesh risks driver contamination), avoiding excessive saturation on any surface (the wipe should be pre-moistened at appropriate levels, not soaking), and checking that specific earphone coatings or materials aren't alcohol-incompatible (some matte coatings can dull with repeated IPA exposure — check manufacturer guidance for your specific model).
For sports earphones specifically marketed for sweat resistance, the materials are typically selected to tolerate IPA exposure, making antibacterial wipes a practical and safe post-exercise maintenance tool. The earphone hygiene routine for regular exercisers benefits from keeping a small pack of wipes in the gym bag for immediate post-workout surface cleaning.
How Do You Dry Earphones Quickly and Safely After Getting Them Wet?
Whether from sweat, rain exposure, or accidental water contact, wet earphones need to be dried carefully to prevent moisture from causing component damage. The correct process: shake gently to dislodge any pooled water from accessible openings, wipe all external surfaces with a dry microfiber cloth, and allow to air dry in an open, well-ventilated position (mesh facing down so gravity assists moisture evaporation) for at minimum 24 hours before use.
Can You Use a Hairdryer to Dry Wet Earphones?
A hairdryer on cool setting, held at least 30cm from the earphones, used for brief intervals (10-15 seconds) with movement, can assist surface moisture evaporation. The warm setting should be avoided — elevated temperatures can soften adhesives inside the housing, deform plastic components, and accelerate degradation of cable insulation. The cool setting provides airflow assistance without thermal risk.
The caution against hairdryer use comes from the heat concern specifically, not from the airflow itself. If you're confident your hairdryer has a genuinely cool (room temperature) setting with strong airflow, it's a useful drying tool. If the cool setting still blows warm air, air drying in a ventilated area is safer. Never use hot air from any source on earphones — the thermal sensitivity of the internal components makes overheating a greater risk than the water damage you're trying to address.
Does Putting Earphones in Rice Actually Work?
The rice drying myth — that placing wet electronics in uncooked rice draws moisture out through a desiccant mechanism — has been largely debunked for electronics. Rice does have a modest moisture-absorbing property, but it's far less effective than actual desiccant silica gel packets at the same task, and the fine rice dust it produces can actually enter earphone openings and cause additional problems.
The evidence-supported alternative: remove silicone ear tips, wipe all surfaces thoroughly, and air dry in a warm, well-ventilated environment. Placing the earphones near (not in) a stream of moving air from a fan accelerates evaporation significantly. If silica gel desiccant packets are available (commonly found in product packaging), placing the earphones in a sealed bag with two or three silica gel packets for 24 hours is genuinely effective at drawing residual moisture out of accessible areas. Silica gel works via the mechanism that rice's advocates claim for rice, but with dramatically better efficacy.
How Do You Deep-Clean Earphones That Haven't Been Cleaned in a Long Time?
Earphones that have gone months or years without cleaning present a more challenging starting condition than regularly maintained equipment. The contamination is dried, hardened, possibly layered, and in some cases biologically active. A deep clean requires more time, more targeted technique, and realistic expectations about what's achievable.
How Do You Remove Heavy Earwax Buildup from Neglected Earphones?
Heavy earwax accumulation — the kind that has hardened to a waxy, amber-colored solid blocking the mesh — requires a softening phase before mechanical removal is effective. Body heat from holding the earphone in a closed palm for 60-90 seconds partially re-liquefies surface earwax, making it more amenable to brush removal. For heavier buildup, a cleaning putty pressed firmly against the wax and slowly peeled away creates adhesive tension that draws the wax out rather than pushing it in.
What Is the Step-by-Step Process for Deep Cleaning Clogged Earphones?
Step 1: Warm the earphone in your palm for 60-90 seconds to soften surface earwax. Step 2: Apply cleaning putty to the mesh, press gently, peel slowly — repeat until the putty comes away with minimal debris. Step 3: Use a soft-bristle toothbrush on the mesh with light outward strokes (earphone mesh-down). Step 4: Re-examine under bright light. For persistent blockage at individual mesh openings, use a fine earphone cleaning pick (or sharp wooden toothpick) at a very shallow angle to carefully dislodge hardened wax from individual holes — never pressing perpendicular to the mesh. Step 5: Final brush pass to remove any loosened debris. Step 6: Clean surrounding housing with IPA-dampened cotton swab. Step 7: Remove, deep clean, and replace ear tips. Step 8: Clean cables, connectors, and case.
The entire process for heavily neglected earphones can take 20-30 minutes for a thorough job. Patience is required — attempting to rush the process by using more force typically damages the mesh rather than cleaning it more effectively.
Can a Deep Clean Restore Sound Quality to Old Blocked Earphones?
In many cases, yes — the restoration can be dramatic. Users who have resigned themselves to degraded audio from earphones they assumed were worn out frequently discover that the issue was entirely a blocked mesh rather than driver degradation. After thorough deep cleaning, the earphone can sound essentially identical to its new performance. The earphone sound quality fix delivered by deep cleaning blocked earphones is one of the most satisfying and cost-effective audio improvements available.
The limitation is that deep cleaning can only restore sound quality to its original level — it can't improve on the original performance, and it can't reverse actual driver degradation from physical damage or component aging. If the driver itself has been damaged (punctured diaphragm, burned voice coil, corroded components), cleaning doesn't address those issues. But for blocked acoustic pathways, deep cleaning is completely curative. The maintain earbud sound principle extends to investing the time in deep cleaning before concluding that degraded sound means damaged earphones.
How Do You Remove Mold or Mildew from Earphones?
Mold growth on earphones — appearing as dark, fuzzy spots or patches, often with a musty smell — indicates that the contamination environment (moisture plus organic material) was present long enough for fungal colonies to establish. This is a more serious cleaning challenge than routine earwax removal because mold requires both mechanical removal of the visible colony and chemical treatment to kill remaining spores.
What Causes Mold to Grow Inside Earphone Cases or Tips?
Mold colonization requires moisture, organic material (earwax and skin cells provide abundant nutrition), warmth, and limited airflow — all conditions present inside a closed earphone case with recent-use earphones stored before they've fully dried. Cases stored in bags, pockets, or damp environments amplify the moisture factor significantly. Foam ear tips are particularly vulnerable because they retain moisture effectively and their cellular structure provides excellent fungal colonization surface area.
The earphone hygiene routine principle of always allowing earphones to air dry before case storage is specifically preventive against mold. Closed-case storage of still-warm, post-exercise earphones before they've dried is the most common setup for mold development. The headphone maintenance tips for mold prevention are therefore primarily behavioral: air dry before storage, open the case periodically to allow moisture exchange with the environment, replace foam tips regularly.
Is It Safe to Use Earphones That Had Mold on Them After Cleaning?
After thorough mold removal and chemical treatment (70% IPA applied to all affected surfaces, allowed full contact time, and followed by complete drying), earphones are safe to use. The IPA treatment kills viable mold spores on the surfaces it reaches. For silicone ear tips that showed mold growth, replacement is preferred over cleaning — the mold may have penetrated micro-surface features of the silicone that cleaning doesn't fully reach, and replacement tips are inexpensive. For foam ear tips with any mold growth, replacement without cleaning is the appropriate response.
For the earphone housing where the mold was purely surface growth, thorough IPA treatment followed by complete drying restores the surface to safe condition. If any mold growth is suspected inside the earphone housing (moldy smell from the driver, visible growth near the mesh opening suggesting deeper penetration), professional assessment or earphone replacement is the appropriate response — internal mold that can't be reached by surface cleaning represents an ongoing health and functional risk.
How Do You Clean and Restore Discolored or Yellowed Ear Tips?
Yellowing of clear or white silicone ear tips is a cosmetic issue that affects appearance without necessarily indicating a hygiene problem — it's an optical change in the silicone material rather than contamination. However, it can also result from earwax staining, which does have hygiene implications.
What Causes Silicone Ear Tips to Turn Yellow?
Two distinct causes produce silicone yellowing. The first is UV photodegradation — exposure to sunlight or strong indoor UV light causes photo-oxidation of the silicone polymer, changing its optical properties to produce a yellow or amber tint. This is purely a cosmetic change and doesn't affect the silicone's functional properties. The second is earwax staining — the oxidized compounds in earwax are highly pigmented and can tint silicone on contact, particularly in the inner bore of the ear tip where earwax concentration is highest.
Can You Whiten Yellow Silicone Ear Tips at Home?
For earwax-stained yellowing: a soak in 3% hydrogen peroxide for 10-20 minutes can oxidize and reduce the pigmentation compounds from earwax staining, noticeably lightening the yellowing. This works because the same oxidative chemistry that whitens teeth acts on the organic pigments in earwax. Thoroughly rinse after treatment and inspect — a second soak may be needed for severe staining.
For UV-degradation yellowing: there is no restoration method. The yellowing from photo-oxidation is a chemical change in the silicone polymer itself that cannot be reversed by any consumer-accessible treatment. If the functional properties of the tips remain intact (they seal properly, remain flexible, haven't hardened), UV-yellowed tips can continue to be used despite their appearance. If the yellowing is accompanied by stiffening or brittleness (the silicone has lost flexibility), replacement is appropriate. The earbud care tips for tip longevity include UV exposure awareness as a minor but real factor.
How Do You Clean Earphones Without Damaging Them?
The gap between effective cleaning and damaging cleaning is mostly about liquid quantity, tool selection, and directional technique. Understanding the specific vulnerabilities of different earphone components allows precise, targeted cleaning that achieves maximum contamination removal with zero risk to function or structure.
How Do You Clean Earphones Without Getting Water Inside?
The fundamental rule for water-vulnerable earphones (those without IPX ratings or with low IPX ratings) is: apply liquid to the cleaning tool, not to the earphone. A cloth or swab should be damp — not wet. Pressing a damp cloth against a surface transfers controlled, minimal moisture. Pouring, spraying, or submerging transfers uncontrolled, excessive moisture with high penetration risk.
Which Parts of Earphones Should Never Touch Water?
The speaker driver opening (any mesh screen or grille covering the driver) should never have water applied directly. The driver diaphragm is immediately behind this opening with no sealing — water applied to the mesh surface wicks directly to the diaphragm. Similarly, any port or opening that accesses the interior electronics should not receive direct water contact: charging ports, microphone ports, and the cable entry point into the housing all provide paths to vulnerable components.
For the earphone housing surface (excluding openings): a damp cloth is generally safe for all but the most water-sensitive earphones, because the surfaces are designed to resist incidental moisture contact. The critical distinction is between surface moisture (cloth wiping) and port moisture (liquid entering an opening). Remove dirt from earbuds by keeping this distinction firmly in mind with every cleaning action.
What Is the Safest Damp-Cleaning Method for Non-Waterproof Earphones?
The safest technique for non-waterproof earphone surfaces: dampen a microfiber cloth with 70% IPA, then press the cloth against a dry surface (a table or your palm) to transfer excess moisture before applying it to the earphone. This "pre-press" technique ensures the cloth is at the minimum moisture level needed for effective cleaning. Apply the cloth to housing surfaces in short wipes, then use a dry section of the cloth immediately after to pick up any residual moisture.
For areas requiring more precision, a cotton swab dampened with IPA and then flicked once against your palm (to remove any drip potential) provides point-specific cleaning with extremely controlled moisture. These techniques deliver effective cleaning without approaching the moisture volume that poses risk to internal components. Clean earphones safely with this minimal-moisture discipline and the process can be applied to any earphone type, regardless of water resistance rating.
How Do You Clean Earphones with an IPX Water Resistance Rating?
IPX-rated earphones have defined water resistance levels that determine how much water exposure they can safely withstand. Understanding these ratings calibrates your cleaning approach — you can be more confident with higher-rated devices but shouldn't treat any rating as unlimited permission.
What Does IPX4, IPX5, or IPX7 Mean for Earphone Cleaning?
IPX4 means the earphone can withstand water splashing from any direction — equivalent to sweat and light rain. For cleaning, this means surface wiping with a damp cloth is clearly within the device's tolerance, but submersion or running water exposure is beyond the rating. IPX5 means resistance to water jets from any direction — more robust than splash resistance. For cleaning, a careful rinse under low-pressure water flow is within tolerance. IPX7 means temporary submersion to 1 meter depth for up to 30 minutes — this is the rating that allows intentional rinsing under tap water.
These ratings are tested with fresh water specifically — the chemical composition of cleaning solutions, sweat, and sea water is different from fresh water and may affect seals differently. Even IPX7-rated earphones may be affected by IPA or other cleaning chemicals if they penetrate seals designed for fresh water. The headphone hygiene approach for rated earphones is to use cleaning methods within the rating's scope but not to assume that "waterproof" means "chemical-resistant."
Can IPX7 Earphones Be Rinsed Under Running Water?
IPX7 rated earphones can be briefly rinsed under low-to-moderate pressure tap water — this is within their tested protection level. The important caveats: avoid high-pressure water (like pressurized shower heads or hose attachments), ensure the water is clean fresh water rather than salty, pool-chlorinated, or chemically contaminated, and dry thoroughly immediately after, particularly any mesh surfaces. After rinsing, allow complete drying before placing in the charging case.
Running water rinsing is primarily useful for sports earphones with significant sweat deposits where a simple wipe isn't sufficient to remove the salt and acid compounds thoroughly. For regular cleaning earphones maintenance, the swab and cloth approach remains preferable even for IPX7 earphones because it applies minimal necessary moisture rather than the maximum tolerated moisture.
How Do You Clean Earphones Without Scratching the Housing?
Earphone housing surfaces — whether gloss plastic, matte plastic, soft-touch coating, metal, or specialty materials — vary in their scratch resistance, and aggressive cleaning techniques or inappropriate tools leave marks that affect appearance and potentially material integrity. The approach to scratch-free cleaning is about tool texture and technique rather than cleaning strength.
What Microfiber Cloth Techniques Prevent Surface Scratches?
Microfiber cloth's scratch-preventing superiority over other cloth types comes from its fiber structure: split microfibers capture and hold particles in the fiber matrix rather than dragging them across the surface. The technique further reduces scratch risk: use circular motions with light pressure rather than linear wiping (which can drag a captured particle in a line across the surface), and fold the cloth regularly during cleaning to expose fresh, particle-free sections. Never press hard enough to feel resistance — light contact pressure is always sufficient.
The pre-wipe to remove loose abrasive particles before any liquid cleaning is also important: loose grit or sand particles on a surface, trapped under a cloth and dragged under pressure, create the scratches that careless cleaning produces. A first gentle dry-wipe to capture and remove loose particles before the cleaning wipe prevents this mechanism.
Can You Polish Earphone Housing to Remove Minor Scratches?
Fine scratches on glossy plastic housing can be reduced using electronic device polish products (plastic polish, screen scratch removers), applied with a microfiber cloth in circular motions. The polish contains very fine abrasive particles that remove a thin layer of the surface material around the scratch, reducing the scratch's visible depth. Multiple applications may be needed for deeper scratches.
For matte finishes, polishing is counterproductive — the abrasive action converts the matte texture to a glossy finish that doesn't match the surrounding surface. Metal housings can be polished with appropriate metal polish products if they develop fine surface marks, though this requires care to avoid getting polish into mesh openings. Soft-touch rubber coatings don't respond well to polish and should simply be cleaned with IPA and left in their existing condition. The earphone care instructions specific to your earphone's material guide appropriate polish use.
How Often Should You Clean Your Earphones?
Cleaning frequency is one of the most practical questions in earphone maintenance, and the honest answer has several layers: a minimum safe frequency, an optimal frequency for performance, and variations based on individual use patterns and earphone types.
What Is the Recommended Cleaning Schedule for Daily Earphone Users?
For daily earphone users, the baseline schedule is: a quick surface wipe after every use (30 seconds, dry cloth only), a thorough cleaning including mesh, housing, and tips weekly (10-15 minutes, full toolkit), and a deep cleaning monthly (20-30 minutes, includes charging contacts, case, and any components not addressed in weekly cleaning). This three-tier schedule maintains hygiene at acceptable levels while not requiring disproportionate maintenance time.
The after-each-use wipe is the most impactful tier for both hygiene and durability. It prevents the accumulation that makes weekly cleaning more difficult and prevents the hardening process that makes earwax removal increasingly challenging over time. The weekly clean maintains acoustic performance and addresses the biological contamination that the quick wipe doesn't fully resolve. The monthly deep clean ensures nothing is quietly degrading in between the routine sessions.
How Often Should You Clean Earphone Tips vs. the Housing?
Ear tips require more frequent cleaning than housings because their biological contamination load is highest — they're in direct contact with the ear canal and accumulate earwax and skin material much faster than the housing surfaces. Cleaning ear tips with every weekly session minimum is appropriate for daily use; cleaning after every use is preferable for tips used by heavy earwax producers.
The housing requires less frequent attention because its contamination (skin oils, finger prints, surface grime) develops more slowly and has lower hygienic urgency than the ear canal-contact contamination on tips. A weekly housing wipe as part of the regular session, with daily dry wipes after exercise sessions, maintains housings in good condition without over-cleaning. The earphone maintenance guide recommends thinking of tips and housings as separate maintenance items with different cleaning intervals.
Should You Clean Earphones More Often in Hot or Humid Weather?
Hot and humid conditions accelerate every aspect of earphone contamination: sweating increases, earwax production and fluidity increases, bacterial growth rates on warm surfaces increase, and mold colonization risk in cases increases. In tropical climates or during summer periods, the weekly cleaning frequency for all surfaces should increase to every 3-4 days, and the post-use wipe should extend to a light IPA wipe rather than dry cloth alone.
Storage practices become more critical in humid conditions — case ventilation (leaving the case open for a period after storing earphones) prevents the sealed moist environment that promotes mold growth. The headphone hygiene implications of climate are practical and significant: users who maintain a weekly routine in temperate climates may find the same routine insufficient in hot, humid environments.
How Do You Know When Your Earphones Urgently Need Cleaning?
The sensory signals for urgent cleaning needs are clear once you know what to look for. The remove debris earbuds approach is triggered by these signals: visible earwax buildup on mesh or tip surfaces (brown-amber deposits, particularly at the mesh opening), muffled or noticeably reduced volume compared to normal (indicating mesh blockage), an unusual smell from the earphones (indicating bacterial or organic accumulation), sticky or tacky surface feel on the housing or cable (indicating unremoved oil film), or visible mold growth (requiring immediate cleaning and treatment).
What Are the Visual Signs That Earphones Are Overdue for Cleaning?
Under a good light source (phone flashlight is excellent for this), examine the mesh: healthy mesh should show open, visible apertures. Mesh that looks uniformly opaque or shows visible brown deposits is overdue for cleaning. The ear tip bore should be clean — visible earwax inside the silicone tip bore indicates tip cleaning or replacement is needed. The junction between the tip and the housing nozzle often accumulates a ring of debris that's visible on inspection.
For over-ear headphones, the ear cushion surface condition is the primary visual indicator — any visible discoloration, sheen from oil accumulation, or white residue lines (dried sweat salt) indicates overdue cleaning. Wireless earbud charging contacts that appear dark or discolored (compared to their original bright metal color) indicate oxidation that needs addressing.
What Sound Changes Indicate That Earphones Need to Be Cleaned?
The acoustic signature of a blocked earphone is distinctive: reduced apparent volume (the sound level seems lower than usual at the same device volume setting), reduced treble presence (high-frequency sounds seem less crisp and detailed), and in advanced blockage, a hollow or muffled quality where the acoustic space of the music seems reduced. These changes happen gradually — daily users often don't notice the drift, which is why periodic comparison to a known-clean reference (or a spare pair) reveals the accumulated degradation.
Crackling or distortion that appears and disappears with head movement, or that correlates with certain frequencies, can indicate debris that's loosely positioned near the driver and vibrating with the acoustic output — this responds immediately to cleaning. The earphone sound quality fix from cleaning for these sound changes is typically complete and immediate.
Does Cleaning Frequency Depend on the Type of Earphone You Use?
Significantly. In-ear earphones require the most frequent cleaning because they're in direct ear canal contact and accumulate the highest earwax load. Over-ear headphones need less frequent mesh cleaning but more frequent cushion maintenance. Wireless earbuds need charging contact cleaning that wired earphones don't. Sports earphones used daily need more frequent post-exercise cleaning than casual use earphones.
A personal cleaning routine should account for all these variables. The baseline schedule described above assumes in-ear daily use — adjust the frequency and focus areas based on your specific earphone type and use pattern. The wireless earbuds cleaning schedule adds charging contact maintenance to the list; the over-ear cleaning schedule adds cushion treatment to the emphasis. The headphone hygiene principle is the same across types; only the application varies.
How Do You Store Earphones Properly to Keep Them Clean Longer?
Proper storage is the best long-term investment in earphone cleanliness because it prevents contamination before it occurs, reducing the frequency and intensity of cleaning sessions needed. The storage habits that matter most are relatively simple to implement and have significant cumulative benefits.
What Is the Best Way to Store Earphones to Prevent Dust Buildup?
Sealed cases — hard shells with latching closures or soft zipper pouches — provide the most effective dust protection for earphones between uses. Any case that fully encloses the earphones creates an environment where ambient dust and environmental debris can't settle on surfaces between sessions. The contrast to unenclosed storage (on a desk, in an open dish, draped over a device) is significant over time — earphones stored in cases have dramatically cleaner surfaces between cleaning sessions than those stored in open environments.
Should You Always Put Earphones Back in Their Case After Use?
After allowing earphones to air-dry briefly following use (particularly after exercise), returning them to their case is the correct storage habit. The brief air-dry before case storage is the important qualifier — storing warm, slightly moist earphones in a closed case immediately after use is the setup condition for mold growth described earlier. The sequence is: remove from ears, wipe with dry cloth, allow 5-10 minutes air dry in an open position, then return to case.
For TWS earbuds specifically, the charging case serves the dual function of case storage and battery charging — this is the natural return point after use. The earbud care tips for TWS users emphasize using the case consistently not just for charging but for the protective storage it provides between sessions.
Are Hard Cases or Soft Pouches Better for Keeping Earphones Clean?
Hard cases provide superior protection because they maintain their structure under external pressure — preventing items packed nearby from deforming the case's walls and compressing the earphones inside. The rigid walls also prevent piercing or crushing from sharp items in bags. Sealed hard cases with good closure latches maintain lower interior humidity than soft pouches (which breathe) in humid environments.
Soft pouches are acceptable for environments where the earphones won't be exposed to heavy bag contents or humid conditions. Their advantage is compactness and reduced weight. For the specific purpose of keeping earphones clean, both provide adequate protection when closed — the key is using them consistently rather than occasionally. The headphone maintenance tips for storage favor hard cases, particularly for premium earphones or for travel scenarios.
How Do You Prevent Earphone Cables from Collecting Dirt and Tangles?
Cable management is both a cleanliness and a longevity issue. Cables that are loosely stuffed into pockets or tangled in bags collect debris along their length as they contact multiple surfaces throughout the day. They also develop kinks and stress points from tightened tangles that eventually cause wire breaks at those points.
Does Wrapping Cables Tightly Cause Dirt to Embed in the Insulation?
Tight wrapping itself doesn't embed dirt, but the repeated friction of cables sliding against themselves during wrapping and unwrapping does abrade the cable surface slightly over time, creating microscopic surface texture that provides better adhesion for contamination. More significantly, cables that are regularly tightly coiled sustain mechanical stress at each coil radius that gradually fatigue the internal conductors and cable insulation.
The preferred cable management technique — the "over-under" coiling method used by professional audio engineers — maintains a natural coil that doesn't introduce cable stress. The coil lies flat naturally, doesn't fight itself, and wraps cleanly into a case without the internal tension that causes self-tangling. Combined with a simple velcro or cable tie to hold the coil, this technique significantly reduces both the mechanical wear and the dirt-collection surface of the cable.
Where Should You Avoid Storing Earphones to Keep Them Clean?
Several common storage locations expose earphones to damaging contamination that accumulates faster than the cleaning routine can address. Pockets are the most common harmful storage location — fabric pockets shed lint and contain the debris of whatever the pocket has previously held. Bag interiors without case protection expose earphones to the entire debris ecosystem of the bag's contents. Dashboard storage in cars exposes earphones to extreme temperature cycling (hot in summer, potentially very cold in winter) that accelerates material degradation.
Why Is a Pocket or Bag One of the Worst Places to Store Earphones?
Pocket and open-bag storage allows lint, dust, and small particles to settle throughout the earphone — in the mesh, in the connector tip, in every crevice and joint. A single day of pocket storage can deposit enough lint in a 3.5mm jack to affect audio quality. Earphones retrieved from a pocket at the end of the day and examined under a flashlight consistently show more surface contamination than earphones stored in a case for the same period.
The remove debris earbuds routine after pocket storage therefore starts from a higher baseline of contamination than case-stored earphones, requiring more thorough cleaning more frequently. The cumulative cleaning time required over a year of pocket storage far exceeds the cumulative time of returning earphones to their case after each use. Case storage is genuinely more time-efficient as well as better for the earphones.
Can Storing Earphones in a Bathroom Cause Mold or Moisture Damage?
Bathrooms are consistently one of the worst storage environments for earphones. Shower steam and post-shower humidity create repeatedly elevated moisture levels that exceed what earphone cases and pouches effectively protect against. The moisture cycles in bathrooms — high humidity during and after showers, followed by gradual drying — promote progressive moisture penetration of any materials not fully waterproof. Over time, this affects adhesives, foam padding, circuit board coatings, and cable insulation.
The mold risk is equally significant: bathroom surfaces maintain residual moisture and warmth between uses, and any organic contamination on earphone surfaces (earwax, skin cells) provides the nutritional substrate for mold colonization in this environment. Bathroom storage is the most reliable way to develop the mold problems described in the deep cleaning section. Bedroom or living area storage in a case is always preferable to bathroom proximity for earphone care.
How Do You Clean Earphones for Kids Safely?
Children's earphones are used differently than adult earphones — more frequently per day for entertainment use, in dirtier physical environments, and handled by users with less hygiene awareness. They also need to be cleaned with products appropriate for children's safety, which creates some additional considerations.
Are Children's Earphones Harder to Clean Than Adult Ones?
Children's earphones typically accumulate a broader range of contamination than adult earphones: food residues, outdoor dirt and environmental debris, craft materials, and the biological contamination profile of children's ear canals (which produce different amounts of earwax at different ages). The combination of higher use frequency and broader contamination sources means more frequent cleaning is required to maintain acceptable hygiene.
What Cleaning Products Are Safe Around Children?
For surfaces that contact children's ears, the primary concern is chemical residue that remains after cleaning and could enter the ear canal. 70% isopropyl alcohol is appropriate because it evaporates completely — when fully evaporated, there is no chemical residue that could contact the ear. This makes it safe for cleaning children's earphone surfaces as long as complete evaporation is allowed before the earphones are used.
Avoid harsh chemicals, fragranced products, and anything containing allergens that a child might be sensitive to. Gentle soap and water is appropriate for silicone ear tips (detached, washed, thoroughly rinsed, and completely dried). For children with known skin sensitivities, even IPA-cleaned surfaces should be allowed extra evaporation time before use. The earphone hygiene routine for children's earphones should use the most basic, minimal effective chemistry.
How Do You Sanitize Shared Classroom or School Earphones?
School and classroom earphones that are shared between multiple students represent a significant hygiene challenge that goes beyond what personal earphone maintenance addresses. The shared-use protocol requires: replacement or individual labeling of ear tips so each student uses their own, disinfection of the housing and cable between users with 70% IPA wipes, and periodic deep cleaning sessions to address accumulated contamination.
For large numbers of shared earphones in institutional settings, a UV sanitization cabinet provides an efficient disinfection solution that treats multiple devices simultaneously without individual chemical application. The disinfect earphones protocol for institutional settings benefits from this efficiency because the per-device time investment of chemical disinfection becomes impractical at scale. The headphone hygiene importance in shared institutional environments is heightened by the epidemiological reality that ear infections can spread through shared contaminated equipment.
How Often Should You Clean Earphones Used by Children?
Children's earphones should be cleaned at least as frequently as adult earphones — weekly thorough cleaning, after-each-use quick wipe — and more frequently if any of the following apply: the child is in a shared-use environment, the child uses earphones during meals or messy activities, the child has an active ear infection or recent upper respiratory infection (in which case after-each-use disinfection is appropriate), or the earphones show visible contamination more rapidly than the standard schedule addresses.
Do Kids Need Their Earphones Cleaned More Frequently Than Adults?
In general, yes — particularly for ages where hand-to-ear contact is frequent (young children) and where outdoor, messy, or food-related activities are interleaved with earphone use. Adult use tends to be more predictable (commuting, working, exercising) with cleaner hands. Children's use is more varied and involves contact with a wider range of contaminating environments. The weekly schedule that works for adults should likely be a twice-weekly schedule for primary school age children using earphones regularly. The earbud care tips for parents managing children's earphone hygiene therefore emphasize shorter intervals and more attention to the surfaces in contact with ears.
What Are the Differences in Cleaning Budget vs. Premium Earphones?
The cleaning approach for budget and premium earphones differs less than most users expect in terms of fundamental technique — the same principles apply to all earphone types. Where differences exist, they relate to material quality, replaceability of components, and the economics of the cleaning investment relative to the earphone's value.
Do Expensive Earphones Require Special Cleaning Methods?
Premium earphones often use higher-quality materials that have specific cleaning requirements. Genuine leather ear cushions (found on high-end over-ear headphones) require conditioning after cleaning as described earlier. Certain specialty coatings used on premium earphone housings may have different chemical tolerances than standard ABS plastic. High-end in-ear monitors often use wood, metal, or composite materials that respond differently to cleaning agents than generic plastic earphones.
How Do You Clean High-End Earphones?
High-end earphones benefit from the most careful version of standard cleaning technique: minimal liquid, maximum mechanical precision, appropriate material-specific treatment for any specialty surfaces. The cleaning process is the same in structure — dry first, then minimal liquid for surfaces that tolerate it, careful attention to mesh and openings — but executed with greater care and attention to material specifications.
For warranty-relevant cleaning: follow the manufacturer's care instructions specifically. Premium earphone manufacturers typically provide cleaning guidance either in the product documentation or on their support pages. This guidance reflects the specific materials used and any particular vulnerabilities of the design. Deviating from manufacturer guidance risks both damaging the earphones and voiding warranty coverage for any resulting damage.
Does Improper Cleaning Void the Warranty on Premium Earphones?
Many premium earphone warranties include specific language excluding damage from improper cleaning, use of inappropriate cleaning agents, or liquid ingress during cleaning of non-waterproof designs. This makes following manufacturer-specified cleaning guidance not just a best practice but a warranty compliance requirement. The earphone care instructions provided by premium manufacturers are therefore worth reviewing before any cleaning session, particularly for the first cleaning of a new premium earphone.
For earphones where manufacturer guidance doesn't exist or is vague, the safest approach — minimum liquid, gentle mechanical tools, material-appropriate chemistry — is the most conservative position that minimizes any risk. The headphone maintenance tips principle of "when in doubt, do less" applies particularly to high-value earphones where cleaning errors are expensive.
Are Cheap Earphones Worth Cleaning or Should You Just Replace Them?
Budget earphones in the lowest price tiers present a genuine replacement-versus-cleaning calculation. If a pair of earphones costs less than the effort and materials required for thorough cleaning, replacement becomes economically rational. However, this calculation changes when health is considered: even cheap earphones should be cleaned regularly because the hygiene implications of uncleaned ear-contact surfaces apply regardless of the earphone's price.
At What Point Is It Better to Buy New Earphones Instead of Cleaning Old Ones?
The replacement threshold has several dimensions: when the acoustic quality cannot be restored by cleaning (indicating driver damage rather than contamination), when the cable has developed wire breaks causing intermittent audio, when the ear tips or cushions are physically damaged beyond what replacement accessories can address, or when the cleaning effort required exceeds the earphone's perceived remaining useful life. The clean earphones safely investment makes most sense for earphones that have meaningful remaining utility — cleaning extends earphone life, but cannot resurrect earphones that have reached functional end of life.
For Egyptian users comparing the cost of earphone maintenance materials, professional cleaning, and new earphone purchases, Mobile Masr (mobilemasr.com) offers a wide selection of earphones and audio accessories across all price ranges — from budget-friendly options to premium models — making the replacement-versus-cleaning decision an informed one based on current market options and pricing. Their catalog includes both wired and wireless models, and their customer service team can advise on which models offer the best durability and easiest maintenance characteristics for specific use cases.
Whether you're maintaining daily-use earphones, preserving a premium audio investment, or setting up a hygiene routine for shared equipment, cleaning earphones properly comes down to consistent habits, appropriate tools, and respect for the specific vulnerabilities of your equipment's materials and components. The time investment in regular maintenance pays for itself many times over in preserved sound quality, extended earphone lifespan, and — most importantly — protection for your ear health.
If you're looking to upgrade your earphones, replace a pair that's reached end of life, or find the perfect audio accessories for your needs in Egypt, visit mobilemasr.com — Egypt's most trusted destination for new and certified-used smartphones, earphones, and audio accessories. From budget-friendly everyday earphones to premium wireless models, Mobile Masr offers verified products with transparent condition ratings and expert guidance to help you find the right choice. Browse the full audio accessories catalog at mobilemasr.com and connect with the customer service team for personalized recommendations today.
FAQs
CONTACT US
©2026 MobiTech Integrated Solutions. . All Rights Reserved